
Introducing the Chronology of Prehistory
 One of the challenges will be to help children gain a sense of the chronology of the prehistoric period and where this fits in to the broader chronology of Romans, Tudors, Victorians etc. These notes provide an outline framework for introducing the chronology of prehistory which we hope history co-ordinators will read and think about in the context of their own schools and then adapt and build on them accordingly. It's important to have a strong sense of what constitute realistic objectives for this age range – for example, for many children beginning to develop a broad sense of the duration of this period in relation to the duration of other periods may well be far more important and achievable than trying to remember the dates of the Iron Age etc!
Please remember that what follows gives outline ideas only it’s impossible to provide a more detailed breakdown because classes and schools differ so much.
1. Use a site or objects as the way into prehistoric chronology
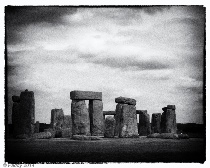
Creating timelines in their own right can be a dry and unmotivating activity. Far better to start away from chronology with a site you are going to be studying (e.g. Stonehenge, Skara Brae or somewhere local to you) or objects found not long before the activity (e.g. the Iron Age coins found in Derbyshire in summer 2014 see here … )
So begin by getting children interested in the finds or place probably quite briefly - then use this as the way in to exploring where the find/place fits in time. If you can, create a sense of puzzle about ‘where does it fit?’
2. Begin with the chronology of more familiar periods and people
Don’t go straight into prehistoric chronology divorced from any known or familiar peoples and events. Begin with the known e.g. a handful of pictures of people today, Victorians, Tudors, Romans or whatever children may recognize.
Then use the pictures for a sequencing activity, working backwards from today. Add the period names, perhaps using post-it notes or other labels.
Once the pictures and labels are in sequence place them on a timeline going back as far as the Romans think about using a physical timeline based around, for example, a 12 inch ruler for a thousand years or a sequence of lego bricks, one brick per century. Use dates on your home-made timeline and discuss why dates helpful.
Children won’t have a good grasp of what a century or a thousand years means but that doesn’t invalidate the activity this is part of the slow process of building that sense of duration. Spend time talking about the length of time, using the period names and develop vocabulary, for example compare the length of gaps between identified periods.
3. Adding prehistory to your timeline
Now return to the site or objects you began with where do they fit on this timeline? See what children suggest then add more ‘time’ back earlier by adding more rulers or lots of lego bricks and show children where the site or find is located on the timeline. They won’t be able to guess or suggest as they don’t have any knowledge framework. Again explore vocabulary to describe how long ago this was and where it fits in with known periods.
Next use a handful of images of other prehistoric sites or objects or scenes (e.g. they could for example be reconstruction drawings of people using stone tools, hunter-gatherers, farmers, Stonehenge or other sites) and see if children can suggest where they might go on the timeline but you may well need to place them yourself.
Then explore what these pictures tell us about the people who used them what life was like in prehistory.
4. Introducing the language of prehistoric chronology period names
The final pieces of the jigsaw are the period names Stone Age, Bronze Age, Iron Age give children labels and discuss why they think these periods have these names. They may need help!
Which do they think is earliest/latest period?
For an introduction to dates, periods see the Prehistory Guide elsewhere on this website.
If you wish you can also use pictures of hunter-gatherers and farmers to explore the change from one way of life to the other and where this goes on the timeline.
One other important item - introduce the word ‘prehistoric’ what does it mean? Put examples of writing on the timeline back to Romans but nothing before that prehistoric means roughly ‘pre-writing’. It’s important to demonstrate this to help children understand the idea one simple way is to have children stand in a timeline with everyone in the AD period holding a piece of writing and everyone before the Romans holding pictures of objects but no written items. Can children spot the difference? What kinds of things can writing tell us that objects cannot? What can the prehistoric objects tell us?
Discuss the length of prehistory compared with Romans and after focus on duration of the periods - don’t worry about the dates.
5. Reinforcement
And finally one activity will not cement all this in anyone’s brain! Reinforce the sense of sequence and duration and the names of periods by repeating the activity in a similar way when studying new sites. Begin each time by seeing what children can remember an important boost to confidence. It will need repeating in later years of KS2 don’t abandon going back to the Prehistoric part of a timeline just because children have moved on to studying the Saxons and Vikings.
Some links to pictures that could be used in creating a timeline
These are just ‘some’ not necessarily the best or most suitable for your class but they may get you started.
Prehistoric farmers several images here but the farming one is well down the page here …
Stonehenge reconstruction drawing by Alan Sorrell here … or there are obviously plenty of modern images
Star Carr reconstruction drawing by Alan Sorrell here …
And more modern reconstruction here …